 This is the first of my tutorials; how to put findings on a necklace, an essential skill!
Many of my necklaces are made on tigertail, a brilliant wire that's incredibly flexible but makes very strong jewellery. To finish the necklaces I use a number of different clasps, but almost always attach them in the same way.
First off, you need a necklace to put findings on! For the sake of argument, and in true Blue Peter style, here's one I made earlier...
Now you need to gather together the relevant findings. To put a basic clasp on a necklace you need the clasp, two jump rings (I normally use 6mm), two crimp beads (small metal beads that can be crushed flat with pliers) and two wire protectors. You can see in the picture that I've put one of the jump rings on to the clasp - depending on the clasp this may or may not be necessary.

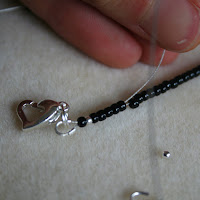
Now you take the crimp beads and put one one each end of the necklace before the final bead. Once you've done that, thread on the wire protector, then slide the clasp into the horse-shoe shape of the protector. Pass the
 tigertail back through the first bead, the crimp bead and four or five more beads.
Pull the end of the tigertail tight, so that the clasp and protector lie next to the end of the necklace and there are no gaps.
Take your pliers, and squeeze the crimp bead hard (you can't do this too hard) to flatten it around the wire. If you tug the wire now it should be secure. You can cut off the end of the tigertail up close to the necklace using wire cutters.
Now do the same to the other end of the necklace, using the jump ring instead of the clasp this time. And you have a finished necklace!
 I hope you find this useful and like the finished product!


Great tutorial! Very helpful :)
ReplyDeleteThanks!
ReplyDeleteWill give this a go, have bought lots of beading stuff in the past but didn't know what to do with it. Thanks.
ReplyDelete